OpenWrt - VNP setup on router
The example uses OpenWrt version 19.07.7 with the Luci web interface.
We recommend using the latest version of OpenWry on the branch.
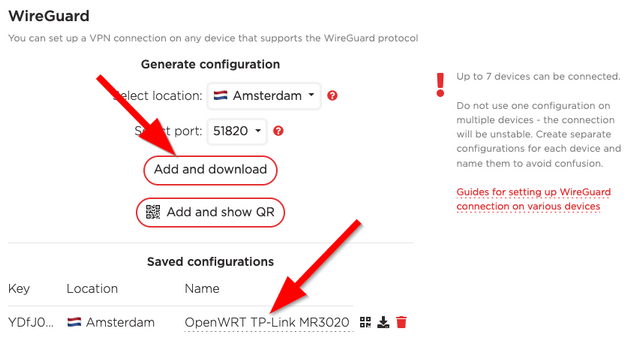
1. Open the WireGuard configurator in the Personal Area: "Manual setup" -> "WireGuard".
Then select the location and port you want to connect to and click "Add and Download".
To avoid confusion, give the configuration a name, for example "OpenWRT router".
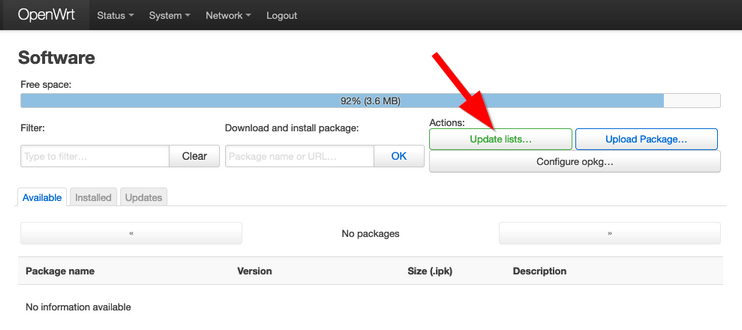
2. Open the web interface of the router, then the menu "System" -> "Software". Click "Update lists" and wait for the package list to update.
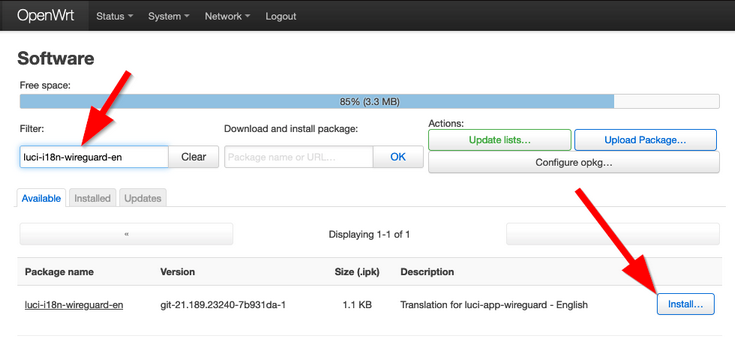
3. In the "Filter" field, enter "luci-i18n-wireguard-en" and click the "Install" button opposite the found package. All the packages required for WireGuard to work will be installed with it.
4. Check that all required packages are installed: enter "wireguard" in the "Filter" field.
Here are the packages to be installed:
wireguard-tools
kmod-wireguard
luci-app-wireguard
luci-i18n-wireguard-en
luci-proto-wireguard
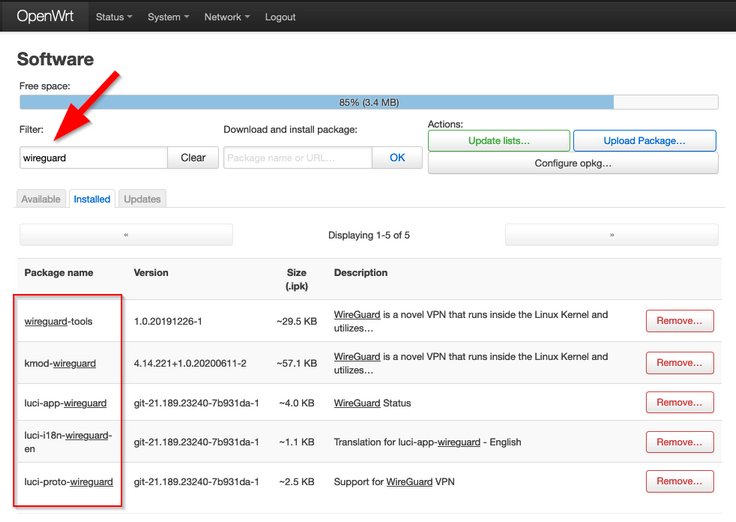
If one of them is not installed, click the “Install” button opposite it.
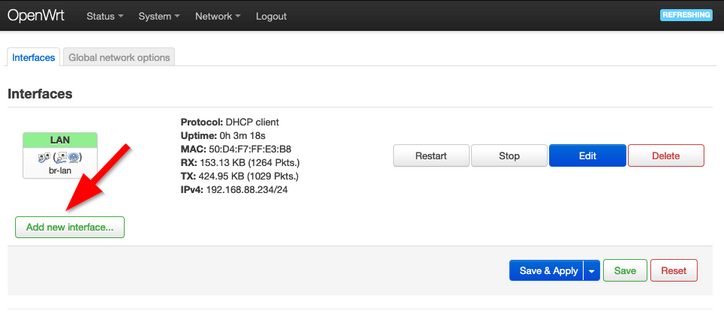
5. Open the "Network" -> "Interfaces" menu. Click the "Add new interface" button.
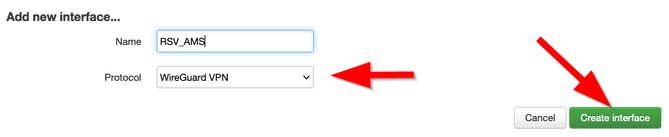
6. Name the VPN connection, for example "RSV_AMS" and select the protocol - "WireGuard VPN". Then click "Create interface".
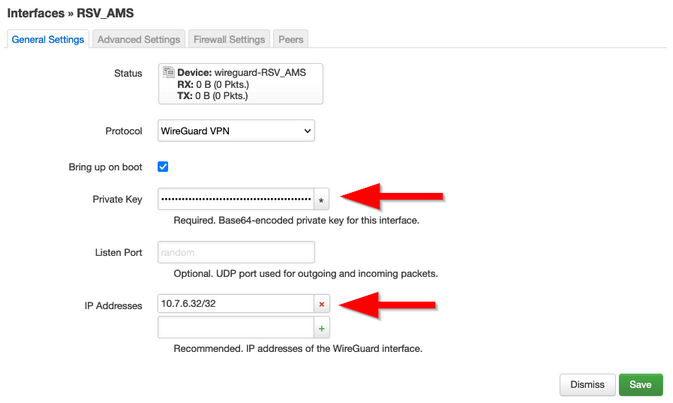
7. Open the configuration file saved in the first paragraph with any text editor.
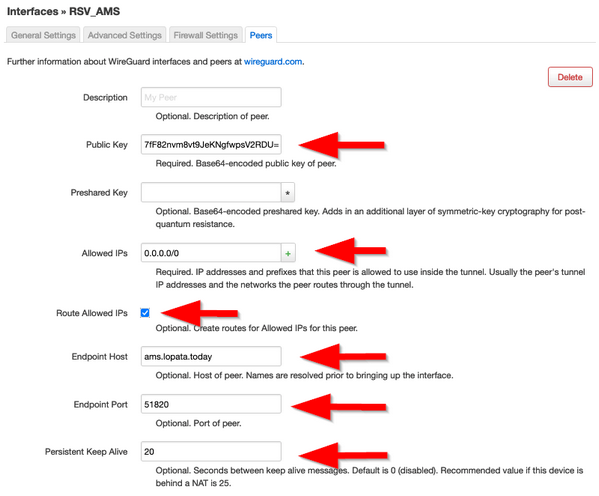
Paste the parameter values into the appropriate fields of the interface:
Private Key - paste the PrivateKey value from the file
IP addresses - paste only IPv4 Address from file (up to comma)
On the Peers tab:
Public Key - paste PublicKey from file
Allowed IPs - 0.0.0.0/0Endpoint Host - paste Endpoint from file - before the colon sign
Endpoint Port - paste Endpoint from file - after the colon sign
Persistent Keep Alive - 20
Enable Route Allowed IPs option
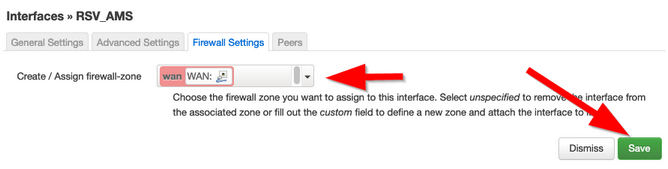
On the Firewall Settings tab:
Create / Assign firewall-zone: WAN.
Click «Save».
9. Click the "Save & Apply" button and reboot the router.
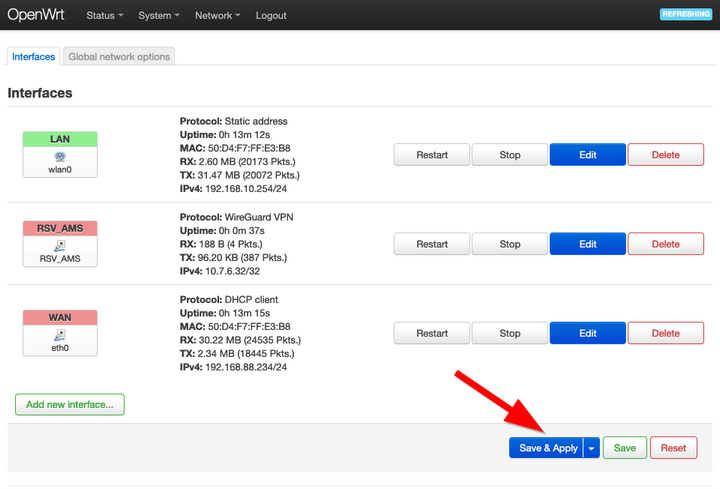
After a reboot, traffic from clients connected to the router must be routed through the VPN.
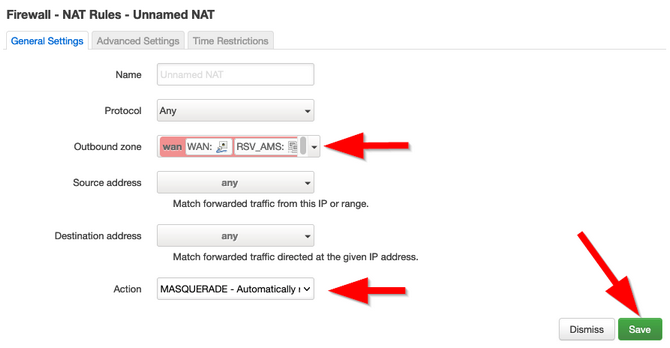
If it doesn't, try adding a NAT rule that configures MASQUERADING.
Open menu "Network" -> "Firewall", tab NAT Rules.
Click Add and select “WAN” in “Outbound zone” and “MASQUERADE” in “Action”, then click “Save” and “Save & Apply” and reboot the router again.