WireGuard on OpenWrt
OpenWrt is an alternative operating system that can be installed on most routers. The article assumes that you already have a router with OpenWrt.
WireGuard® is a modern VPN protocol designed for secure and high-speed data transmission over the Internet.
It is recommended to use this protocol if your Internet provider does not restrict VPN protocols or services.
If there are any restrictions or connection issues, please use the VLESS (XTLS) protocol via Podkop or AmneziaWG 2 via our guide.
Before installation, make sure that:
• at least 30 MB of free space is available (recommended)
• you have SSH access to the router with root privileges
• you have a WireGuard configuration file in .conf format from your Personal Area (in our example, the configuration file Lithuania.conf will be used)
Configuring WireGuard on an OpenWrt router
1. Install the required WireGuard packages:
opkg update && opkg install wireguard-tools luci-proto-wireguardor in LuCI: go to System → Software, enter the package names in the Download and install package field, click OK, and confirm the installation.
Creating a WireGuard Interface via LuCI
2. Open the router’s web interface in a browser: http://192.168.1.1 (or specify a different router IP) and go to: Network → Interfaces → Add new interface:
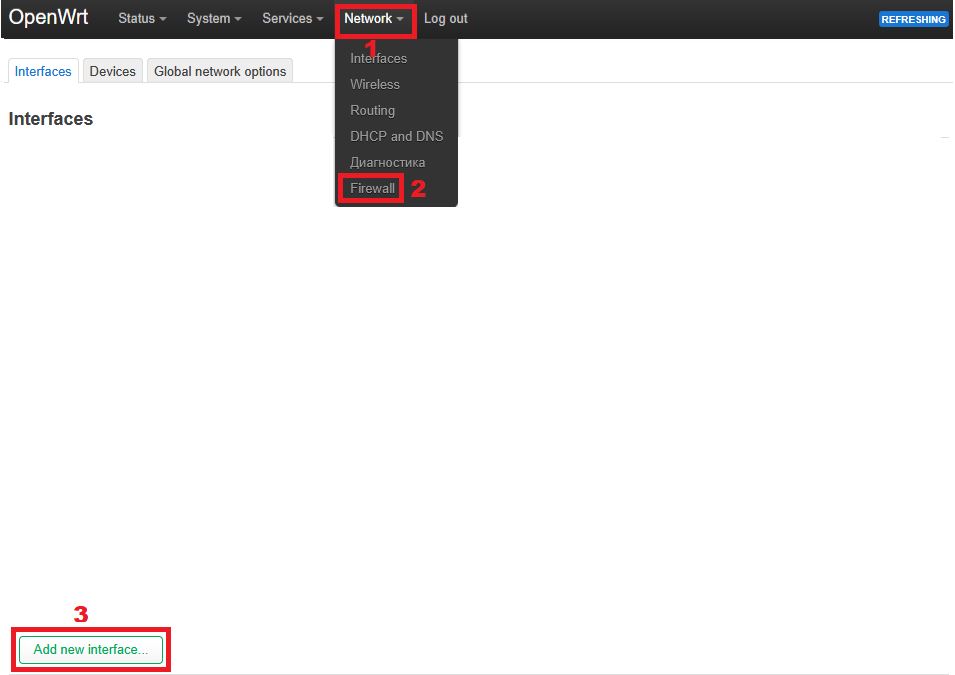
3. Specify the parameters:
• Name: Lithuania (or any other name of your choice)
• Protocol: WireGuard VPN
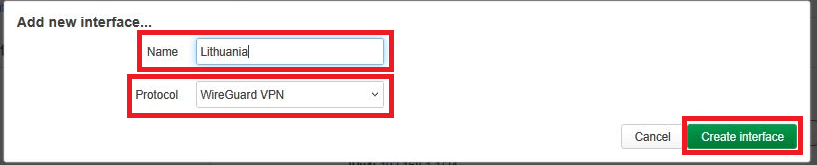
4. Click Create interface.
Importing the Configuration File
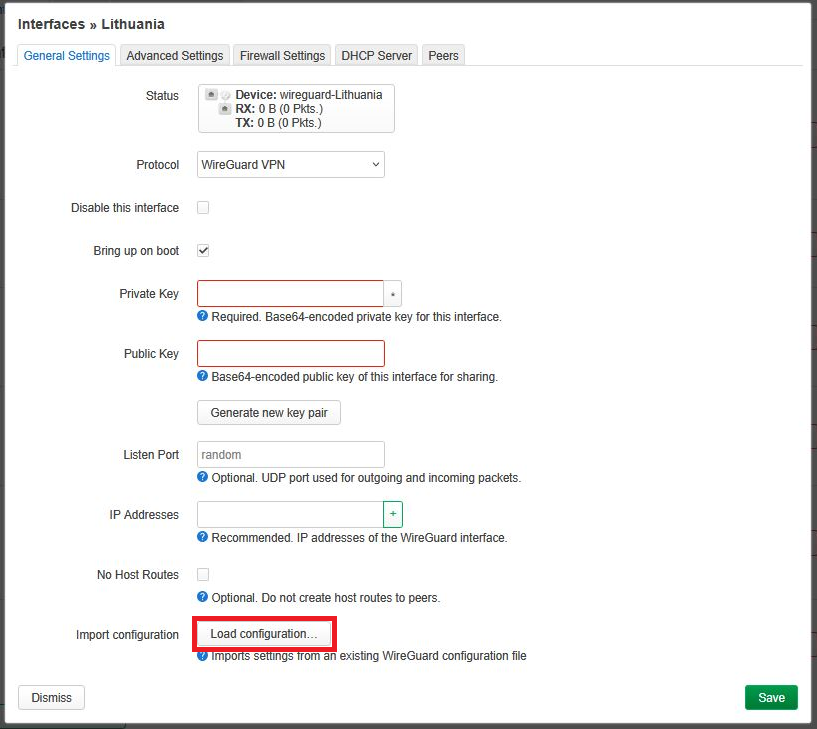
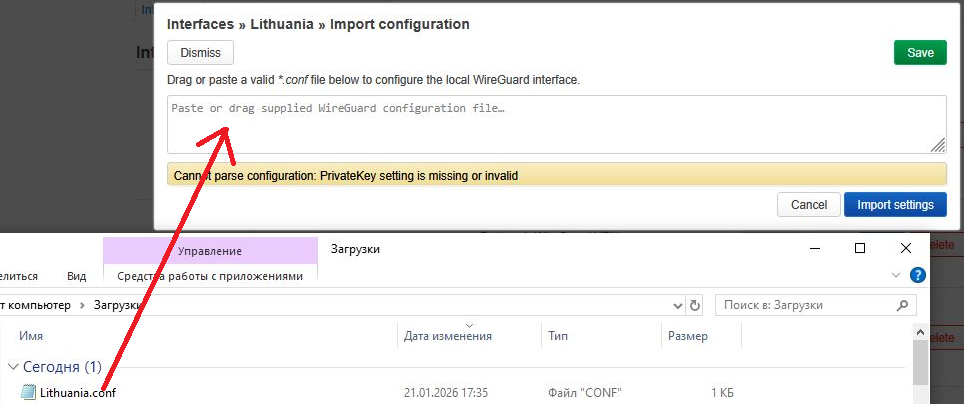
5. In the interface settings, click Load Configuration and paste the contents of the .conf file or upload the whole file.
Click Import settings (if necessary):
Checking the Parameters
6. Open the configuration file in a text editor and verify that the values match:
In the "General Settings" tab:
Private Key
IP Addresses — from the [Interface] section
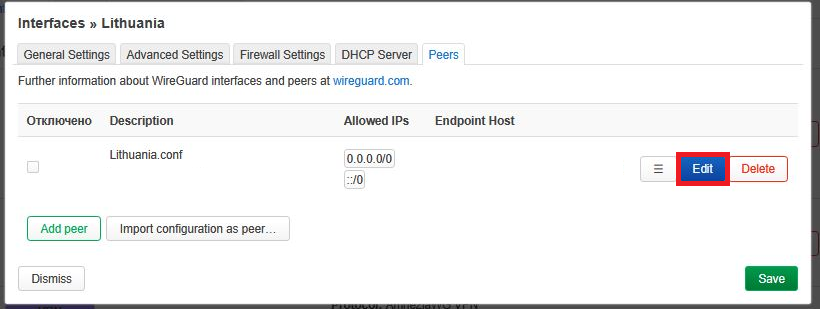
In the "Peers" tab:
Public Key
Allowed IPs: 0.0.0.0/0
7. For the newly created Peer, click Edit:
8. Enable the Route Allowed IPs option:
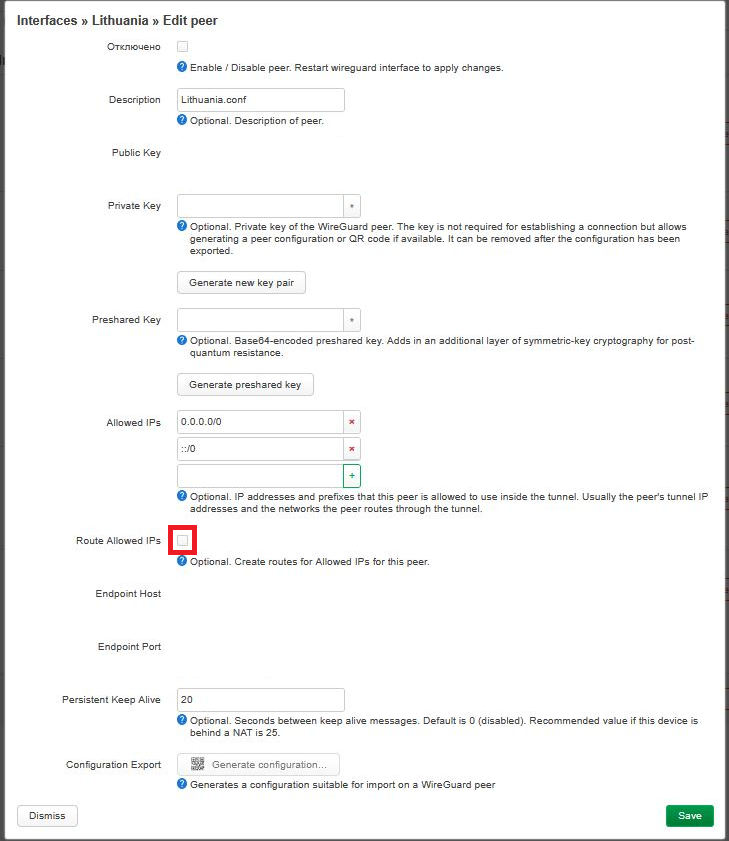
9. Then click Save, followed by Save & Apply.
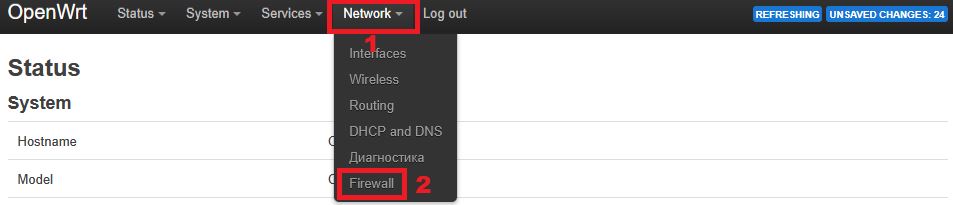
Assigning a Firewall Zone
10. Go to Network → Firewall:
11. Create a new zone with these settings:
Input: reject
Output: accept
Forward: accept
Masquerading: ✅ enabled
MSS clamping: ✅ enabled
In Covered networks, specify the interface created in step 3
In Allow forward from source zones, select the lan zone
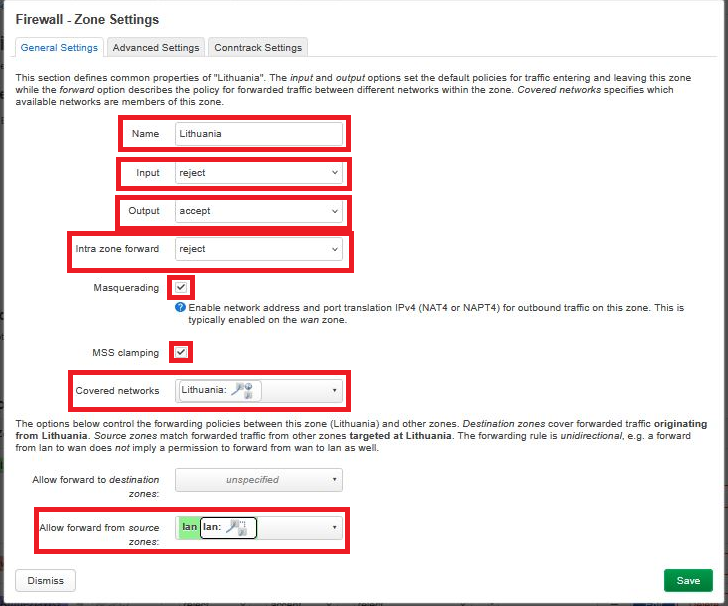
12. Click Save, then Save & Apply.
13. Click Edit for the lan zone:
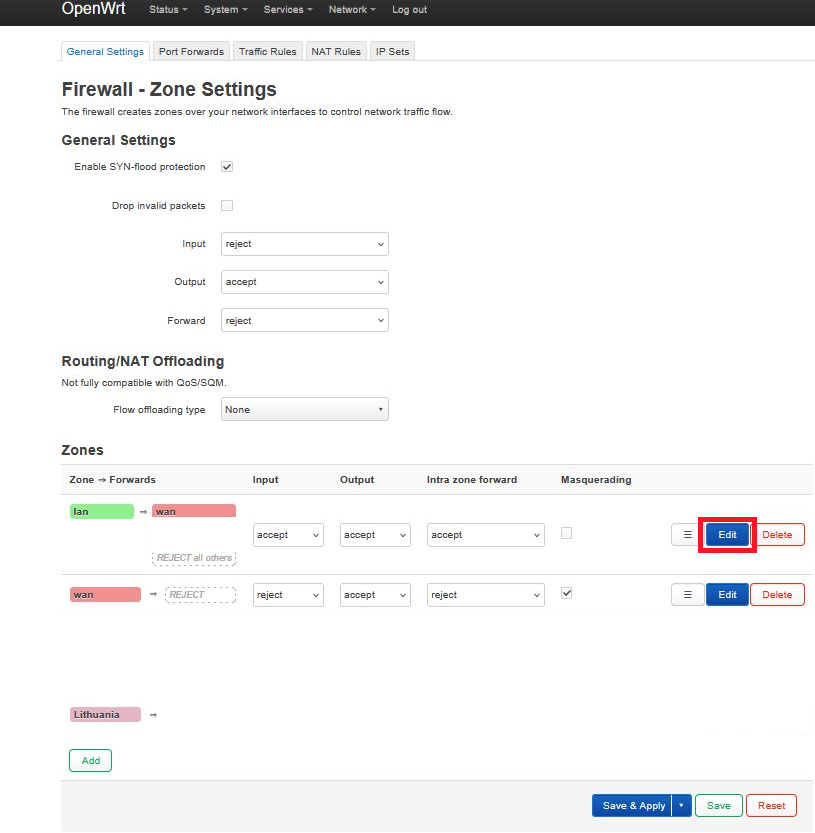
14. In the Allow forward to destination zones field, add the VPN zone you created.
15. Click Save, then Save & Apply.